This summer some friends of mine are putting together an immersion-style theater event for a group of 9-17 year olds. Modeled after murder mystery dinner parties and drawing heavily on the Harry Potter books by J.K. Rowling, the event will be a day of student orientation for a new, North American school of wizardry. As things go along, I hope to post the occasional report. Here is the first.
The Headmaster for the day needs a proper wizarding hat. But as the event is scheduled for July, the actor wants something in the straw hat department. We both did research. A quick search on Google Images using the term "wizard hat" brought up a range of styles that were Tolkienesque, Disneyesque, Potteresque, Medieval-like, Princess-y, and Halloweenish.
Gandalf-style hat
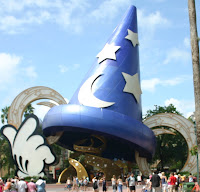
Disney-style hat
Medieval-style hat
Princess-style Hat
Harry Potter-style Hat
The actor sent me some screenshots of hats worn by characters from various Harry Potter movies, but the best thing he sent was a picture of himself wearing his favorite straw hat. He'd used Photoshop to tweak the hat into the shape he had in mind (below).
My plan was to crochet the hat as that would give me the most flexibility in terms of shaping the hat while it was in progress. I found several possible inspirations for my approach. Lilli at Hawdancing Studio makes some fantastically colored witch hats:
For my purposes, the best thing about Lilli's design was the wide, flat brim (she put wire around the outer edge to keep the round shape). The pattern was a bit too pointy, though.
Cheryl Oxsalida designed a more traditional witch hat (above). That pattern is here.
Another idea came from the long, cone-shaped stocking caps that were popular when I was a kid.
In the end, I found my working pattern in the fat, 3-ring binder I have used over the years to archive design ideas I come across. The pattern was one I'd found in a British book of crochet designs -- the title of which, unfortunately, I failed to note when I copied the pages some 12 years ago. The pattern was for a series of cone-shaped caps for children. Reviewing the stitch sequence, I realized the hat was likely to be too big too fast at the base and began modifying things right away.
I decided I had to test drive the pattern first. To do that, I used some art yarn I'd been given as a gift.
I decided I had to test drive the pattern first. To do that, I used some art yarn I'd been given as a gift.
The original pattern called for an increase of 8 stitches every third row. This made a nice cone shape (see blue child's cap above), but the pitch of things was too steep, too much like a traditional witch's hat. So I modified the pattern to increase 10 stitches and played with just when to do that: every 3rd row, or every 4th row, etc.
Here's Version 1.
I used a slip stitch along the bottom edge of the cone to "change direction" and allow the brim to be perpendicular to the hat.
But when put on a head mannequin, the base began to stretch around the round top of the skull. The headmaster actor had asked that the hat be cone-shaped all the way to the brim.
Part 2 of this series will show the next version of the hat (am hoping I need to make only three to get things right). I will also post the instructions in the final post.


