27 June 2012

A Summer Solstice Type-In


Summer Solstice at Stonehenge (England)

It was a fine if somewhat cloudy June 23rd in Madison, Wisconsin. I, brother Architect, niece Hoja, and friend Whimsey joined the Friends of Starkweather Creek SASY Neighborhood Association community as we all celebrated the Summer Solstice. The biannual event (they also do a Winter Solstice party) is a collection of picnicking, music, puppetry, playing, and, at the moment the sun sets, a bonfire -- all in a lovely setting on the shores of Lake Monona.


 Puppets being made before the event.  
For more pics and stories, see the Procession of the Species site here.


Thanks to my Head Roadie and Chief Grip (aka my Beloved Spousal Unit) the Type-In set and equipment were well-packed for the trip to Madison. 


Our section of the park was along the lakeside. We four -- Architect, Hoja, Whimsey, and myself -- set up in a line.  Hoja described it as a Utopian Strip Mall

Architect & Whimsey played an old timey photography team. Their set was a grandly painted canvas backdrop and a fanciful camera (designed & built by Architect). 


Schematic for backdrop                                           Painting of the backdrop


The event always includes a Grand Procession with many people in costumes and many large puppets. Their camera booth was hopping all afternoon.


The costumes, masks, and giant puppets were wonderful!  
I will post pics of the Procession of the Species soon.


Hoja hosted Mz. Mimsy's Tabernacle of Tea ("Potions, Portents & Perfumes"), a tent filled with pillows, good scents, and relaxation. The tent - with walls created with decorative fabrics - served up a variety of teas in fancy teacups accompanied by bikkies.  


She reported the traffic of visitors was good.  The festival had much action and noise.  People were glad to find this little oasis to take a respite from it all.


Professor Remington

I, in my persona du jour -- Professor Remington -- hosted a Type-In booth. This event was planned before I knew it was National Typewriter Day.  It was a perfect lead-in sentence, though, when people wandered up all curious about why I was doing this.


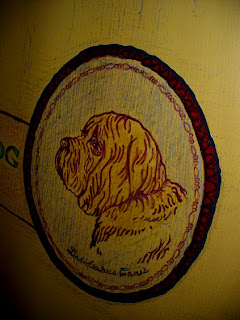
 (L) Decidiasus Canus (Latin trans: The Lazy Dog)
(R)  Vulpes Velox (Latin translation: The Quick Fox)

The previous week I'd designed and painted the Professor Remington billboard.  It proved the perfect advertisement for passersby.

Because I was going on the road with this for the first time, and because I didn't know precisely what the park site was going to be like, I created this schematic of how I hoped I'd be able to set things up.


As it was, time considerations and a rather gusty wind off the lake prevented me from putting up the tent.  No worries, though.  Things looked pretty grand as it was.


Thanks to Madame H, I had two wonderfully funky and old desk top machines which I staged at a separate table.  I set a copy of the Typewriter Insurgency Manifesto on the platen roll of each.


It didn't take long for the festival-goers to wander by.  There seemed to be four kinds of folks.

Parents and their Children.

The neat thing about the families that stopped by was the excitement of the parents as they showed their kids the machines they used before computers. I didn't have to do much there as the parents quite happily became the teachers. 


Teenagers and Young Adults.

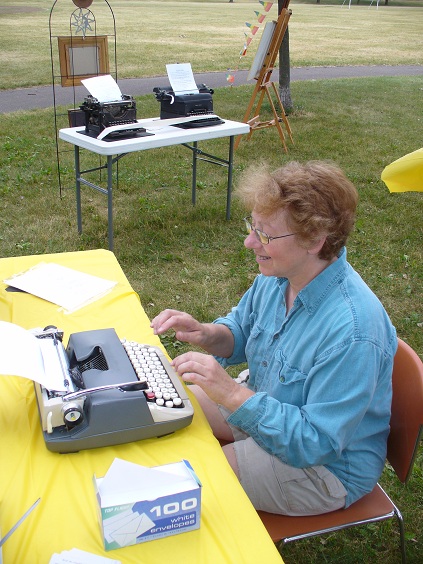
Not surprisingly, the typewriters were total magnets for teens and 20-somethings.  A little shy most of them were, but once I persuaded them to sit down and showed them the basics of how the machines worked, their enjoyment was reflected by their serious intensity.


The Old Hands.

Then there were the much experienced typists.  When they saw the machines, they smiled and laughed. You knew them right away: they immediately placed their hands confidently on the keys -- fingers correctly positioned -- and, after a few false starts, muscle memory kicked in and they were typing away again as they always had.


The Soloists.

There were a few visitors that struck me by their quiet focus and delight.  They walked in almost invisibly and waited for a machine to become available.  Once seated, they became completely absorbed, undisturbed by the bustling action all around.


This lady below purposely chose one of the two machines with a black/red ribbon.  She typed for quite awhile.  At one point, she paused.  I happened to be standing there and, since that machine had been acting up, asked if all was well.  She just smiled and said very softly, "I am writing a love letter."


These two young lads (below) came back several times.  The one on the left was completely fascinated.  "I am going to get one of these." he told me.  So I gave him the business card I'd made up for the occasion with the link to the info I've created  for this blog.  And I took more time than I did with most of the kids to show him how to do a basic hands-on test of a machine to make sure everything was in working order.  


I made sure he tried all of the machines, telling him that he wanted one that "felt good" when he typed.  "You'll be tempted to buy the first one you see," I said.  "If it's a good one, then go for it.  But don't be afraid to wait and look a little more."  You'd think I'd been telling him how to trick a leprechaun out of his pot of gold, so intensely did he listen!


The display machines drew a lot of interest as well. One man was a photographer and was quite intrigued by the older Underwood.  He took pictures for at least 10 minutes. 


All told, the Summer Solstice Type-In welcomed 70-80 visitors.  They were excited and took lots of camera-phone pictures of each other typing. They came by before I finished setting up and stayed until the light faded five and a half hours later. As I was putting the machines back into their cases at the end, one young lass begged if she could "please type just a little more."  I put her at the far table with a machine and told her, "I'll put that one away last."

So, our little Utopian Strip Mall was just that for the afternoon. People rested in the Tea Tent; had their portraits taken with a fantastical camera in front of the beautiful backdrop; and discovered -- or rediscovered -- the wonders of typing.

Many thanks to 

Jennifer B. for the loan of the folding tables and rolling dolly; 
my sister Song for the use of the canopy tent; 
Madame H and her sister for the two display typewriters; 
brother Architect for the chairs; 
nephew Quicksilver and passerby Mr. D for helping me reload my car at day's end; 
-- and ever and always -- 
my Beloved Spousal Unit, who continues to find such entertainment in my creative projects. 


20 June 2012

Another Sneak Preview: What's Needed for an Outdoor Type-In


Emblem of my character for the day:
Professor Remington

I'm laughing and grinning like crazy in anticipation of this coming Saturday's Summer Solstice Type-In!  If you're in the Madison, WI vicinity, check out the area across the street from the Olbrich Botanical Gardens.  I am told things commence around 4pm.  What exactly "things" are is unknown to me, so you'll probably want to bring a picnic lunch and plenty of sun and bug spray.  

Here's what I'll be bringing
(not including the costume, wig, biz/info cards,
and copies of the Typewriter Insurgency Manifesto as a handout)!
And for those of you who can't make it, look for a blog report here soon after!


Check out this website - Procession of the Species - to see what else is going on nearby.

Weeeeeeeeeeeeeeee!

18 June 2012

Fictional Correspondences: Real Mailboxes for Fictional Mail


Some many years ago, when Dante’s Wardrobe was in its original incarnation as a mail order rubber art stamp company, I jazzed up a few mailboxes with paint, decoupage, sequins, and gold metallic ink pens. One ended up in a tree house out in Olympia, WA. Another went to a friend who used it as an indoor mailbox that she and her husband used to send each other love letters. And one stayed with me for the storage and display of mail art I received. Here are a few pictures of that long ago and much used mailbox.


How did I make them? It was pretty straightforward. First I got some rural-style metal post boxes at The Home Depot.  


At that time, all they had were plain black ones. So I also got some enamel spray paint. Before I painted them, I washed them with warm soapy water and with with vinegar to remove any grease or fingerprint oil that would affect how well the paint stayed on.

Once dried, my plan was to decoupage various images I had cut out from magazines onto the now-painted metal surfaces. I used Mod Podge, a combined glue and sealing craft product as the adhesive.
I used the matte finish version, but Mod Podge comes in a range of finishes from plain matte to sparkle and shimmer. The company has posted a PDF info brochure about the Mod Podge products here. (* and **) If you haven't done decoupage before, the makers of Mod Podge have some good info and tutorials here.

The images were ones I'd collected from magazines at the time. Dover Publications has a nice range of image books for crafters here. Many of their publications are clip-art books with CD's, but you can also buy print books of images, such as one I like a lot: Old Fashioned Luggage Labels. Here is a sampling.


If you decide to print your own, use the best quality paper you can. Ditto for the inks and/or toner. The images are likely to fade over time in any event, so you want to protect them as much as you can.

After I finished applying the images and letting the project dry I used a metallic gold marker to draw some stars and squiggles and such. You can get them at most art shops or the standard crafts stores such as Michaels and JoAnn's.

Finally, to seal and protect the postbox, I applied several coats of a clear polyurethane spray.

But you don’t have to limit yourself to the classic mail box shape or metal material. Check out these postboxes just waiting for your imagination to make them into something grand. I found them all on Amazon by searching under the keyword mailbox. But you can find many different kinds of mailboxes locally at such store as The Home Depot, Menards, Blain’s Farm and Fleet, Sears, etc.


You can also decorate wooden boxes – this would work well if your porch keeps your mailbox area dry or if you want to use the box for indoor delivery. This “Cherrywood Letter Box” from Color Bakery gave me some new ideas for future letter boxes. 


The Michaels crafts store and JoAnn Fabrics both carry wooden containers that can be made into letterboxes. The online store Walnut Hollow also sells smaller boxes that could be used for letter keepsake boxes. (The boxes aren’t listed in the main links. Click on the Home Décor link to find them.)


Don't have time to make your own mailbox? There are many creative people out there who can do it for you. Here are just a few.**

Brandon Wilson's Etsy store The Bus Box has some lovely Volkswagen-themed mailboxes.


An artist named Sandra has a wide range of wall and post-mounted mailbox that she has designed and painted herself. She also does custom work. Her website is here. And just to give you an idea, here are a couple to show you her beautiful creations.


Needing something a little more jazzy? Dr. Torch will paint some mean flames on a mailbox for you!


As will the folks at Twisted Fire.

.


Need more inspiration? Typing in the keywords mailbox or letterbox at Google Images turns up a number of really unique items.

Finally, there is nothing that says you have to have a decorated mailbox to have a fictional correspondence. I once found an old cast iron mailbox like the one below at Goodwill that worked very nicely. 


I gave it to a friend as a gift -- after filling it with a few art pens and a bag of old postage stamps!  But even an old shoebox will work.  The point is to play so use what works for you.


*  ModPodge can be found at Michael’s, JoAnn Fabrics, or at online shops such as DickBlick.com.
** Disclaimer: I have no affiliation with any of the companies I've mentioned  - just telling you what I used and/or found and where to get it.

_________________________________________

This marks the end of the Fictional Correspondence series. If anyone has ideas for something they would have like to see covered and didn't, please let me know in comments section below or via email. I'd be happy to create some more posts.

You can follow the entire series via these links.

1. Fictional Correspondences: What are they? Why do one? How to begin.
2. Fictional Correspondences: Creating A Writing Persona
3. Fictional Correspondences: Finding Someone to Write To
4. Fictional Correspondence:  Making Your Own Letterhead - Part 1: Design
5. Fictional Correspondences: Making Your Own Letterhead - Part 2: Implementation
5. Fictional Correspondences: Addressing Fictional Postcards for the NonFictional U.S. Mail
6. Fictional Correspondences: So You Are an Imaginary Correspondent . . . What's Next?
7. Fictional Correspondences: Creating "Really Real" Mail
8. Fictional Correspondences: Real Mailboxes for Fictional Mail (this one)


Related Posts Plugin for WordPress, Blogger...